Gentlemen’s and Ladies’ Guide to Murdering Bullymongs
Steps on Guide Use:
- If you’re looking for a specific enemy, first make sure you’re in the right section. As they are all split up by enemy categories.
- If you’re in the right section, all enemies will be listed in alphabetical order (not the order in which they appear in the game) this is to assist those who are new to the game.
- Certain enemies will have a snapshot of their’s after their name, this is to give you a visual idea of what you’re dealing with. This is not a good way to find enemies though, as some tend to look alike.
- All information is constantly updated and inquiries on the enemy are not only answered, but taken in to account and added in to enemy information.
- Enemies are also listed in categories, make sure to be looking in the right category. (Regular Types, Badass, and then Boss enemies, in that order).
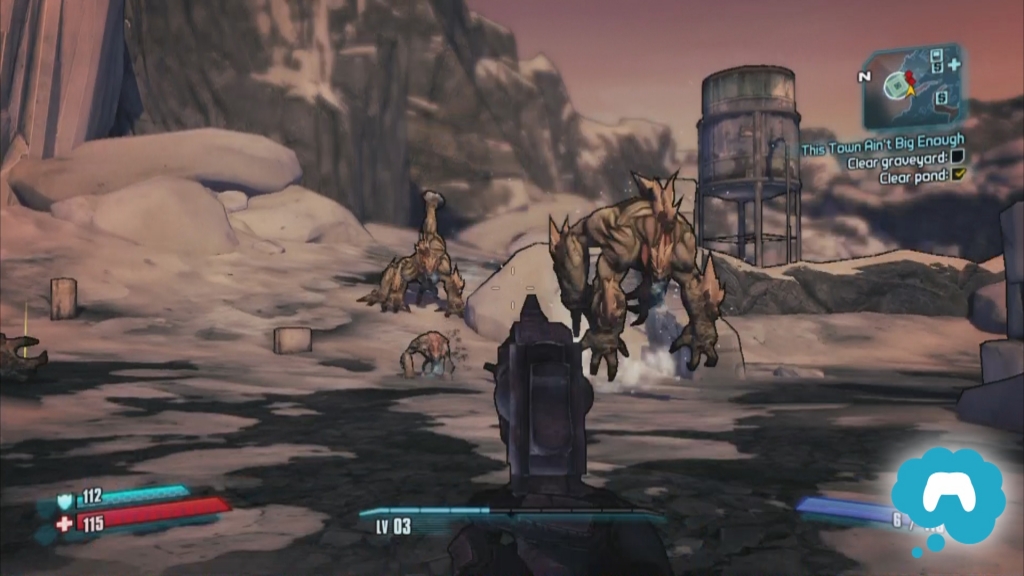
TYPES OF BULLYMONG
–Bedrock Bullymong
Appearance:
http://poly.news/wp-content/uploads/2012-09-26/borderlands2_webleveled_-_david_hodson.jpg
Elemental Weakness: Incendiary.
Mobility: Incredibly high jumps. Moderate running speed.
Critical Spot: It’s head.
Dodging Pattern: Erratic Strafes.
Cover Use: Elevation.
Ranged Attack: Thrown pieces of terrain.
Melee Attack: Wide hooks and slams.
Battle Strategy: Bedrock Bullymong are the Eridum Blight’s answer to earlier Bullymong. They have nothing particularly special about that, except for the fact that they’re tougher than their Southern Shelf variants. While they do have a noted melee capacity, if the VH withdraws a reasonable distance, the Bedrock Bullymong will almost always instantly resort to ranged. These projectiles can be dealt with easily, and you should be adept at doing so by now. Step back a few paces. Remember, side strafing is enough to dodge most of the projectiles (do so after it is thrown as they do take your motion in to account).
–Bullyrott
Appearance:
http://hydra-media.cursecdn.com/borderlands.gamepedia.com/d/dd/Bullyrott.png?version=d565ce719b171ffd3efc4940dd29f8b4
Elemental Weakness: Incendiary.
Mobility: Impressive Jumps. Fevered running and charging.
Critical Spot: It’s head.
Dodging Pattern: Erratic strafes.
Cover Use: Elevation, but rarely employs it.
Ranged Attack: Vomits a corrosive spew, which can cause the Corrosive status effect on the VH.
Melee Attack: Two handed attacks as well as a mini-AOE ground pound.
Battle Strategy: These Bullymong as resistant to Corrosive, and also dole it out. These status effects can cause a great deal of trouble, as they prevent shield regeneration. Also, they will rarely allow you the opportunity to find cover. The biggest weakness of these Bullymong is they stand out. After dispatching of a few Bullymong from distance, they will often come out in the second wave. Which means if you correctly spotted the herd, you can dispatch them with potent incendiary weapons from a great distance away. If they do sneak up on you, their attacks actually do cause them to stand still for a moment, and as they often appear in open terrain, it is best to instantly create distance.
–Demong
Appearance:
http://hydra-media.cursecdn.com/borderlands.gamepedia.com/6/61/Demong.png?version=6f95d9047e9352bdedad24e1560e7e4c
Elemental Weakness: None. Explosive can be helpful.
Mobility: Incredibly high jumps. Moderate Running speed.
Critical Spot: Head.
Dodging Pattern: Erratic strafes.
Cover Use: Elevation. Rarely used.
Ranged Attack: Thrown Fireball. Fire Spew.
Melee Attack: Common Badass Bullymong Melee Set.
Battle Strategy: Demongs are one of the harder bullymongs you may face. In some ways, they may be a far greater challenge than Badass Bullymongs. While they lack the Badass’ defensive maneuvers, they are resistant to the only viable element against therm. Using Explosive can be very handy. They’re large enough that they’ll soak up plenty of the damage, and they often spawn in areas where they’re surrounded by other Bullymong. If you’re particularly worried about them. They only spawn in the Eridum Blight, and nearly every location allows for cars. Pinning one down under the vehicle and disposing of him may be a good way to take out the biggest threat. Their thrown fireballs can be dodged, so as with other Bullymong, it may be wise to keep a distance.
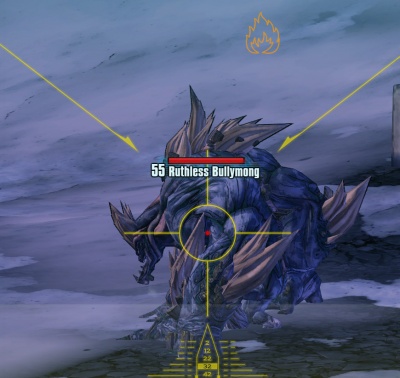
–Ruthless Bullymong
Appearance:

Elemental Weakness: Incendiary.
Mobility: Impressive jumps. Moderate running speed.
Critical Spot: It’s head.
Dodging Pattern: Erratic Strafes. High Jumps.
Cover Use: Climbs to higher elevations.
Ranged Attack: Tosses bits of the terrain (one at a time) at the opponent.
Melee Attack: Primary form of combat. A wide hooked punch.
Battle Strategy: These tend to be the most common form of Bullymong, and are the benchmark for Bullymong battles. They should’ve presented you with little challenge in the past, but UVHM can be slightly different. Keep your distance from them, as they pack a moderate wallop, especially on characters with poor melee abilities. They’re quite large, and aiming for their heads is surprisingly easy, despite it looking proportionately smaller than their bodies. They throw single volley rocks, which are far easier to deal than you’d expect, as they can be shot out of the air (especially by Shotguns). They do have some dodging capacity, so be careful how you unload clips which take a while to reload.
–Ruthless Bullymong Brat
Appearance: image of NM variant

Elemental Weakness: Incendiary
Mobility: Long jumps. Small bursts of running speed.
Critical Spot: It’s head.
Dodging Pattern: None.
Cover Use: Elevation.
Ranged Attack: None.
Melee Attack: Quick swings.
Battle Strategy: These should provide no one with any particular challenge. The Brats are excellent for getting your kill skills going. As they have no ranged attack, they will be sure to charge at you, but are often pushed out of the pecking order by the larger variants, who will get to your first. You can leave them alive for second winds, but as Monglets may often be present, they aren’t the optimal choice for doing so. They can provide some issue for certain VHs who rely on distance, and they do have enough power to jostle you, so while they are not imperative targets, they shouldn’t be wholly ignored either. It often takes them several jumps to reach a height, and this could be used to riddle them before they get to where you are.
–Ruthless Bullymong Slinger
Appearance: image of NM variant

Elemental Weakness: Incendiary.
Mobility: Minimal, as it relies on projectiles.
Critical Spot: It’s head.
Dodging Pattern: Concerted, although casual, strafes between volleys.
Cover Use: Elevation, cover fire.
Ranged Attack: Thrown projectiles.
Melee Attack: Moderately powerful punches.
Battle Strategy: Slingers seem to be a daunting opponent in early UVHM as they toss projectiles at the VH’s while they’re concentrating on charging opponents. This is often down to poor planning. Slingers will almost always try to posture themselves for projectile use, and in doing so, leave themselves yards away from the combat. It is possible, if not probable, to draw Melee Bullymongs away from the Slingers and deal with them, then returning in to range of the Slingers and disposing of them by either shooting their projectiles out of the sky, or simply side strafing in order to avoid them. When in a vehicle, if at the right distance, you can actually maintain fire in order to deal with nearly ALL Bullymong projectiles, so long as the turrets are pointed slightly upward.
–Ruthless Monglet
Appearance:

Elemental Weakness: Incendiary.
Mobility: Dashes towards the enemy. Quick hops.
Critical Spot: It’s head.
Dodging Pattern: Moves erratically, but no actually attempts at dodging.
Cover Use: Elevation, for brief periods.
Ranged Attack: None.
Melee Attack: Small swipes.
Battle Strategy: Anyone incapable of dealing with Monglets best not travel to Pandora. That is common knowledge. It is really not how you deal with them, but rather how you use them, that is most critical here. Monglets can be disposed of with a single headshot, and many people aim for this. This may not be wise. Vault Hunter’s who have poor second wind skills may find it advantageous to leave on alive. Inversely, if you do wish to get rid of them, do so in a manner that assists your kill skill status. Draw their friends out at the same time, then finish one off quickly. Those whose kill skills benefit their health or shield can also use them to swing the battle back towards their favor. They’re more of an asset for you, than they are for the enemy. The deeper you get in to the game though, the less frequent they are.
TYPES OF BADASS BULLYMONG
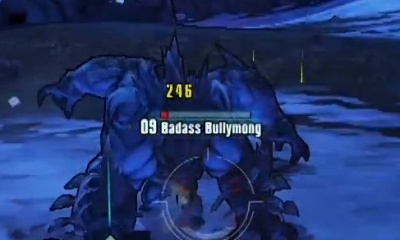
–Badass Bullymong (Variants: Super)
Appearance:

Elemental Weakness: Incendiary.
Mobility: Faster than their size implies. Incredibly high jumps.
Critical Spot: Head, which they can guard with their arms.
Dodging Pattern: Erratic Strafes and quick movement.
Cover Use: Minimal.
Ranged Attack: Tosses terrain.
Melee Attack: Swings. Slams. A potent AOE power slam. Tackles.
Battle Strategy: Badass Bullymong’s seem to pop out around conventional opposition, and in doing so, turn the tide of the battle for the worse. Setting them ablaze is often a good move, as well as keeping a relative distance. This can be far more difficult than with their weaker brethren. Badass Bullymongs can protect themselves with the bones they have on their arms, and react to consecutive critical hits. They’re often vulnerable as they’re climbing down from the “wall-sphincters” and this is a good time to begin slagging them. As they have the tendency to charge, any ability/item which may draw them back (such as Singularity Grenades, Phaselock, or Pets) can buy time. They’re very rarely alone, and are very often swarmed with their counterparts. It may be best to get a quick offensive kill skill of, and concentrate on them then. Due to their size, they may have difficulty getting in to certain locations. You may use this to your advantage if you need to run and heal.
–Badass Bedrock Bullymong (Variants: Super)
Appearance:
(Not Available)
Elemental Weakness: Incendiary.
Mobility: Faster than size implies. Tends to concentrate on projectiles.
Critical Spot: It’s head.
Dodging Pattern: Rarely used. Erratic strafes.
Cover Use: Elevation.
Ranged Attack: Strongest projectile from a Non-named Bullymong.
Melee Attack: Swings. Slams. Potent AOE power Slam. Tackles.
Battle Strategy: These are by far the most potent form of Bullymong, who are not named. They are actually stronger than some of the named Bullymong on Pandora. Approach with EXTREME caution. If you see them in the distance in a collection of Bullymong, plan ahead. See how much distance you can make and plan your slagging before you enter the fight. The projectiles these Bullymong hurl can cause enough damage instantly take the Vault Hunter out of the fight, and causing them to flee. Approaching them is also not the best of ideas, as they have the same AOE as their Southern Shelf variants. Drawing their attention away is usually one of the best approaches. While their projectiles are potent, they are also just as manageable. They’re quicker to the draw than the typical Slinger, so shooting and scooting may be best. Also, don’t be afraid to use hit and run tactics against them, as they too can cover their critical spot with their arms. Just as with other Badass Bullymongs, breaking their attack pattern (Phaselock, Singularity Grenades, Pets) is advised.
TYPES OF BOSS BULLYMONG
–Donkey Mong
Appearance:
http://hydra-media.cursecdn.com/borderlands.gamepedia.com/1/19/Donkey_Mong.png?version=0e0ed881f6455ce14d10cbcecd840509
Elemental Weakness: Incendiary.
Mobility: Potent speed and jumping, but concentrates on throwing his barrels.
Critical Spot: It’s head.
Dodging Pattern: Moderate strafes, mini-dodges when in proximity.
Cover Use: None.
Ranged Attack: Throws a powerful explosive barrels.
Melee Attack: Hooked swings and slams.
Battle Strategy: The most dangerous aspect of fighting Donkey Mong are those large barrels on his back, which he can throw to devastating effect. Of the few points he can spawn on many of them allow for almost immediately withdrawing upon seeing him, which any unseasoned Vault Hunter should do. This will allow you to seek cover, as well as apply slag before the battle begins. He will hustle forward like most Bullymong, but concentrate on tossing his barrels. Seeing as you have the advantage of distance, this may be an easy task. Should you be operating with a Melee character, or one who must be close for other reasons (shotgun heavy), there is actually a way to send him in a loop. If you’re within a certain range, he will switch between concentrating on the barrels, and swatting you away. This will catch him in two minds, and allow you to exploit his indecisiveness. It should be noted that the later strategy can be very deadly, as a misstep could put you within range of both of his attacks.
–King Mong
Appearance:
http://hydra-media.cursecdn.com/borderlands.gamepedia.com/1/15/King_Mong.png?version=022e38ba8f5f4383983cab957c6c63e5
Elemental Weakness: Incendiary.
Mobility: Incredibly quick, with wide and high leaps.
Critical Spot: It’s head.
Dodging Pattern: Can strafe, but does so rarely as it is usually on the offensive.
Cover Use: None.
Ranged Attack: Tossed terrain.
Melee Attack: Powerful swings. Ground pound AOE. Leaping attacks. Tackles. Counters.
Battle Strategy: King Mong is accurately named, as he is arguably the most powerful Bullymong (if one doesn’t considering Jackenstein to be one). He is an amalgam of almost everyone Bullymong, which makes him incredibly dangerous. He does although have an incendiary weakness, as well as an attack pattern which any Bullymong Hunter should be used to by the time they see him. Much like Donkey Mong, it is best to approach King Mong from a distance. If you approach one of his spawn points and he is already active, you may begin to plan the battle out. Should the circumstance be such that he needs to be coaxed out this can actually be to your advantage. Any ability that requires ticks (such as Bloodlust or Anarchy) as well as any ability that requires kills, may be brought up prior to King Mong appearing, meaning you can unleash a powerful volley right of the spot. Since he must descend down the mountainside, you can lay an ambush of either grenades (Singularity or otherwise), or other such diversions. When hunting for King Mong, you can use the vehicle to initiate the fight, and quickly retreat. The Eridium Blight has an abundance of natural rock formations which can be used as cover, as well as Hyperion infrastructure. King Mong is large, even for a Bullymong, which means any cover that is small enough that he can not enter, as well as protect your from volleyed projectiles, may make you relatively impervious to anything he has to offer.
–Knuckle Dragger
Appearance:
http://hydra-media.cursecdn.com/borderlands.gamepedia.com/7/70/Knuckle_Dragger.png?version=be7d78e65477e5cf0c6ebd352f36b8e3
Elemental Weakness: Incendiary.
Mobility: Huge leaps, capable of scaling several stories. Very tedious movement.
Critical Spot: It’s head.
Dodging Pattern: Strafes naturally, causing one to miss.
Cover Use: Jump to the very top of the Hyperion barge, making him difficult to spot.
Ranged Attack: Tosses terrain/vehicles.
Melee Attack: Standard hooks and wild swings.
Battle Strategy: Knuckle Dragger may seem terrifying at first, but he is incredibly gimmicky, and easy to handle. During the first confrontation, he will flood you with smaller opponents. You may choose to let the Ruthless Monglets live, on the rare chance that you may need a second wind. If you’re clearly in the advantage in this battle, if may be wise to actually chain a few kill skill off of the weaker opposition. Knuckle Dragger has the tendency to leap on top of the barge, and this can actually be incredibly useful. While many fights early in UVHM are often slugfests, Knuckle Dragger can retreat in time to let you recover. It should be noted, that the large storage crate which acts as the entrance to the fight can be used to send him in a bit of a loop. He’ll try to jump to intercept you and you can easily reverse, while he must repeat his leaping process. This alone can give you time to regenerate your shield.
–Midgemong
Appearance:
http://hydra-media.cursecdn.com/borderlands.gamepedia.com/8/89/Midgemong.png?version=7bdbce686d028aed3640b50d5208aa56
Elemental Weakness: Incendiary.
Mobility: Increadible movement speed and quick leaps so long as mounted. Almost immobile when dismounted.
Critical Spot: Both the head of the Midge and the head of the Mong.
Dodging Pattern: Dodges aptly and weaves in between the corridors of his fortress.
Cover Use: Innate. He will move around, making it difficult to find him not behind cover.
Ranged Attack: Midge’s shotgun.
Melee Attack: Mong’s swipes and pounds.
Battle Strategy: Midge-Mong can be a daunting opponent if not dealt with quickly. He himself poses a threat which is about equal to a well planned for Badass Bullymong, but his incredibly speed and cunning can make him a mess. During your first meeting, you can actually plan the assault as he will only appear once you hit the door. In later meetings, getting close enough to his room will cause him to dash out and immediately head for his men. He can summon a slew of opposition. On the other hand, you’re now at the very top. Use your elevation as an advantage. Chain kill skills, and peek over the edge to pop opponents in the face. Be wary when entering Midge’s room though, as two Badass Marauders are often waiting in there as his personal bodyguards. If you do manage to gain control of the room, you now have a safe nook from which to fight out of. When choosing on who to concentrate on, Mong actually offers far more of a challenge, as he is the source of alacrity. Take him out, and you’ll have a stationary opponent.
